Enterprise
Run Endee on your own infrastructure: cloud VMs, bare-metal servers, or private cloud. The installer pulls pre-built Docker images and configures a Docker Compose stack in a single command.
Free trial included: Enterprise deployments come with a 1-month free license so you can evaluate Endee in your environment before committing. Contact contact@endee.io to get started.
Install
Run the installer on your Linux server (Docker is required):
curl -fsSL https://endee.io/install.sh | bashThe installer is interactive. It asks a few questions and accepts defaults with Enter:
Install directory [/home/ubuntu/endee]:
Root/admin token (set your own!) [<unsecured_root_token>]: your-secret-token
Host data directory [/home/ubuntu/data]:
Server (API) port [8080]:
Web UI port [8081]:
Always set a custom root token. The default is intentionally insecure. Generate a strong one with openssl rand -hex 32 before running the installer.
Once you confirm, the installer:
- Writes a
docker-compose.ymland.envinto the install directory - Creates the host data directory (default:
~/data), this is where Endee stores all its data, including collections, objects, and the license file - Pulls
endeeio/endee-enterprise:latestandendeeio/endee-web:latestfrom Docker Hub - Starts both containers and waits for the server to pass its health check
When complete, you’ll see:
------------------------------------------------------------
Endee is up and running!
------------------------------------------------------------
  Web UI     : http://localhost:8081
  API base   : http://localhost:8080/api/v2
  Root token : your-secret-token
  Data dir   : /home/ubuntu/data
  Config     : /home/ubuntu/endee
------------------------------------------------------------
Verify the server is healthy:
curl http://localhost:8080/api/v2/health
# {"status": "ok", "timestamp": "..."}
Manage the Stack
All stack management is done with docker compose from the install directory:
cd /home/ubuntu/endee   # or your chosen install directory

docker compose logs -f            # stream logs
docker compose ps                 # check container status
docker compose down               # stop and remove containers
docker compose pull && docker compose up -d   # upgrade to latest images
Activate Your License
The server starts in restricted mode until a valid license is activated; only read-only and license endpoints are available. Activation happens through the Web UI at http://localhost:8081.
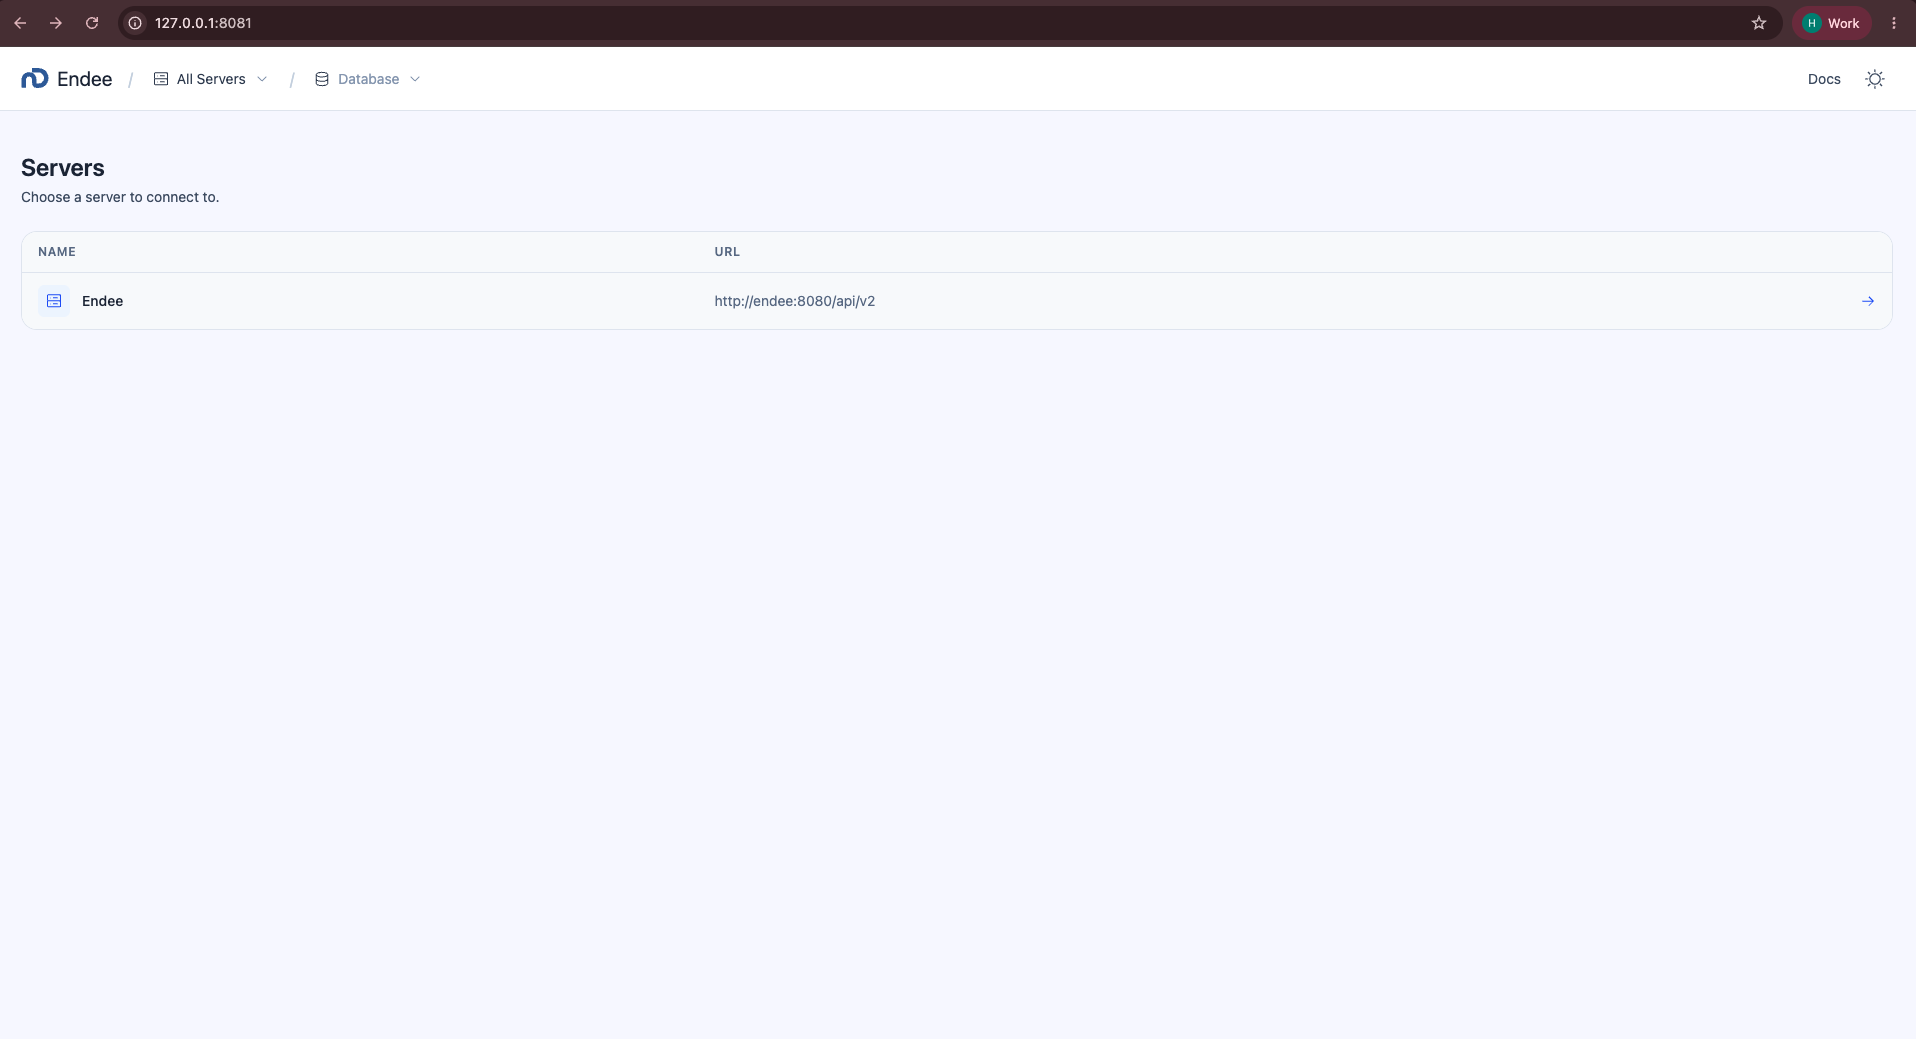
Open the Web UI and select your server.
Navigate to http://localhost:8081. Your Endee server is listed, click it to enter the dashboard.
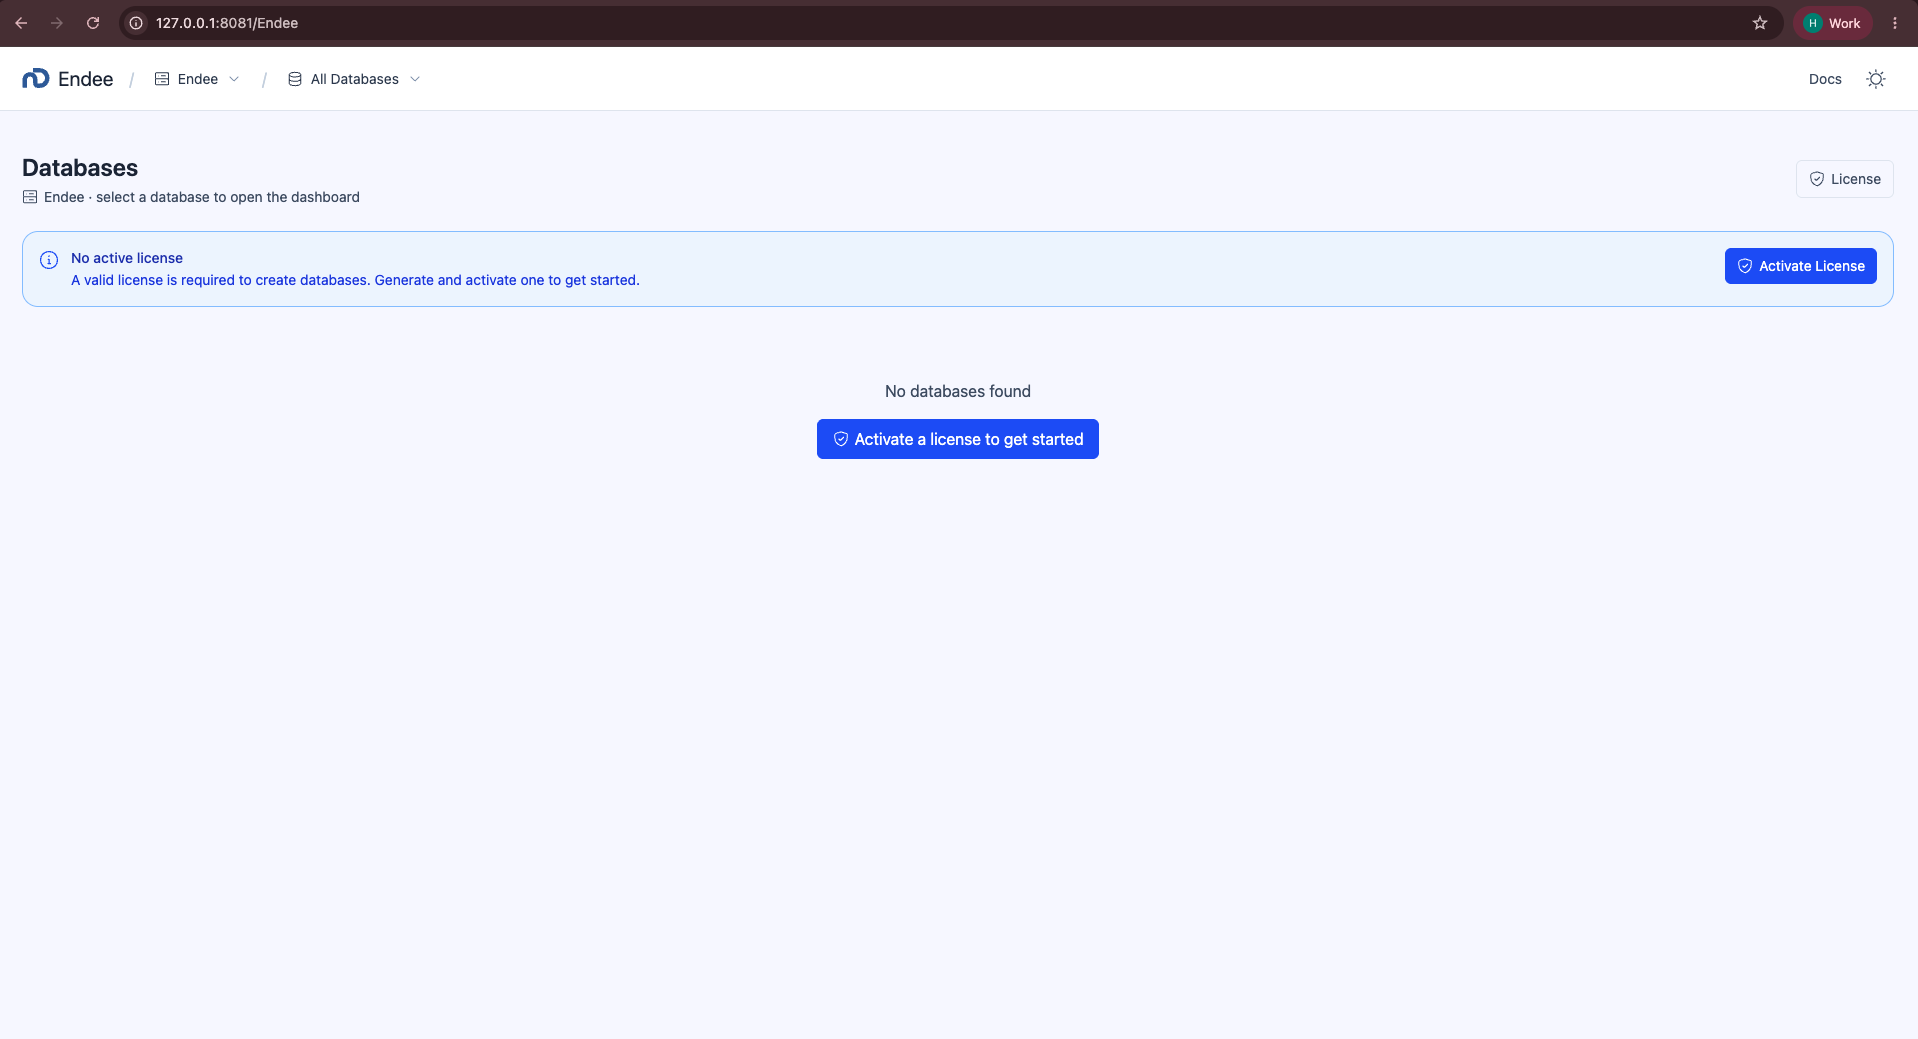
The Databases page shows the license required banner.
Until a license is active, the dashboard shows No active license and no databases can be created. Click Activate License.
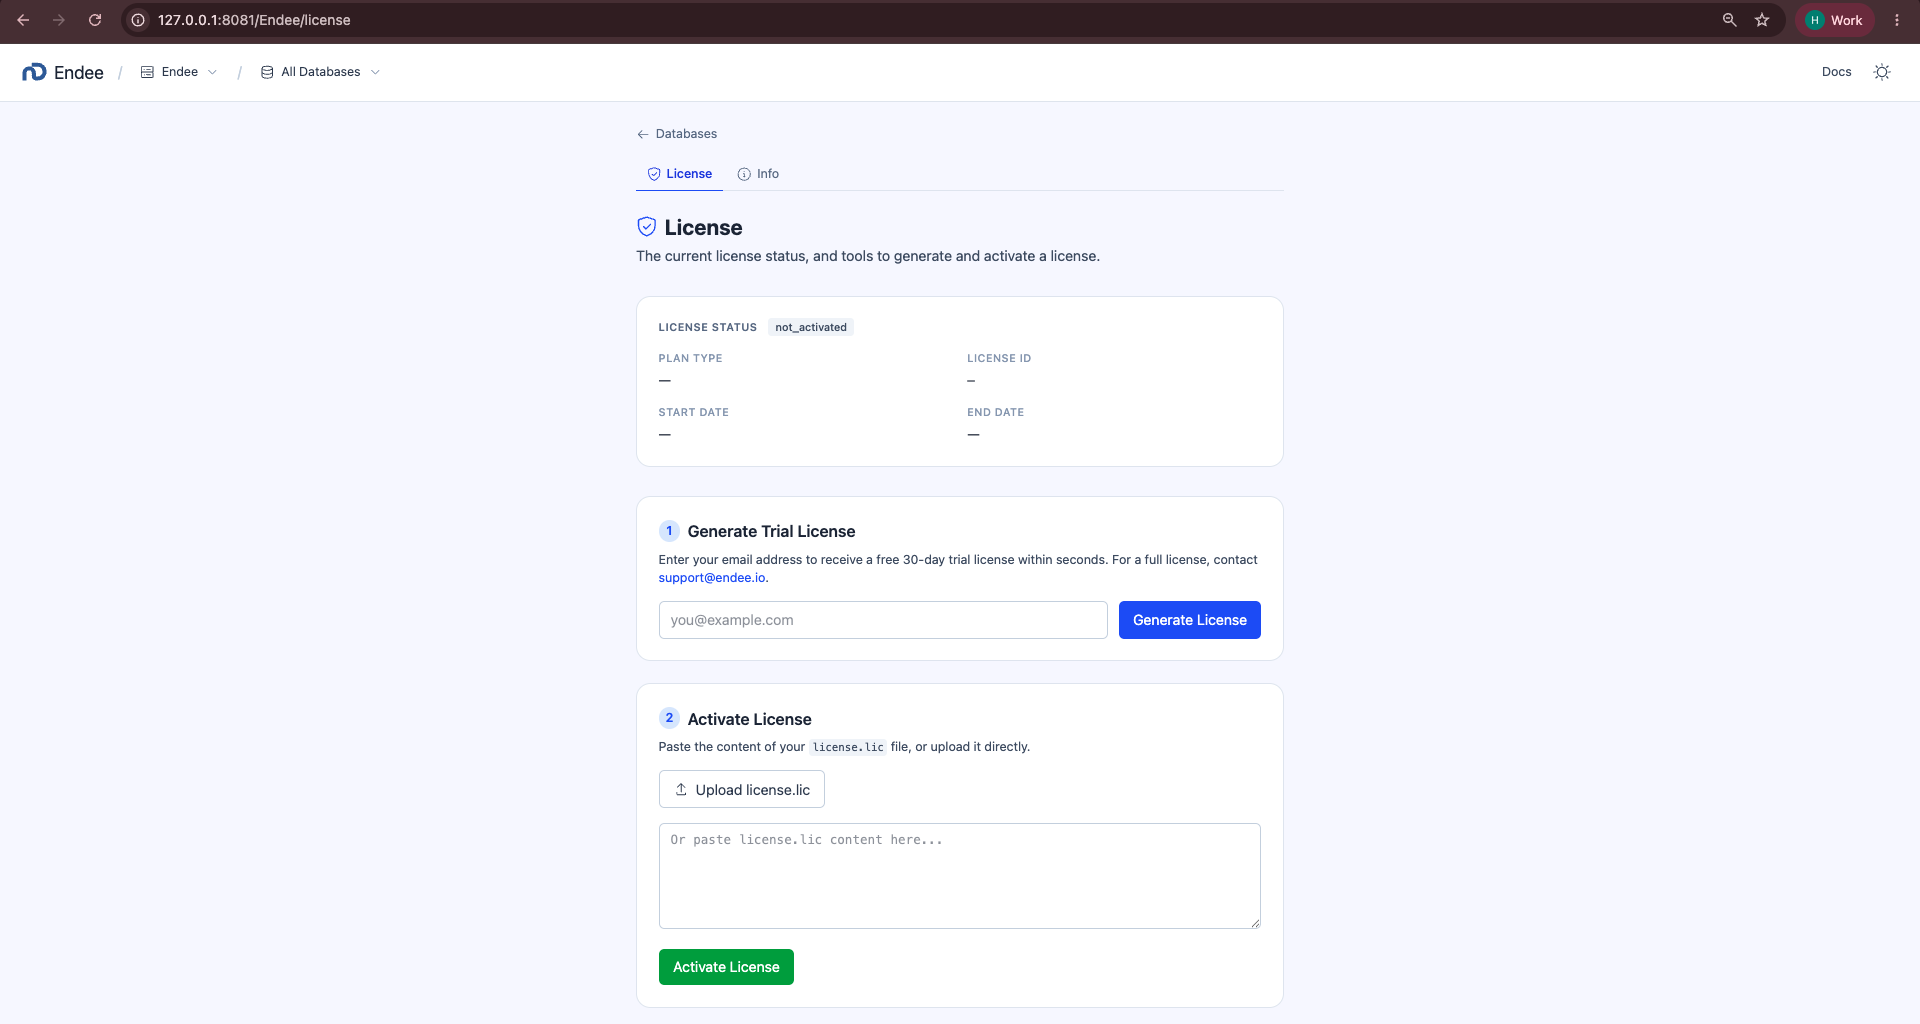
Step 1: Generate a trial license.
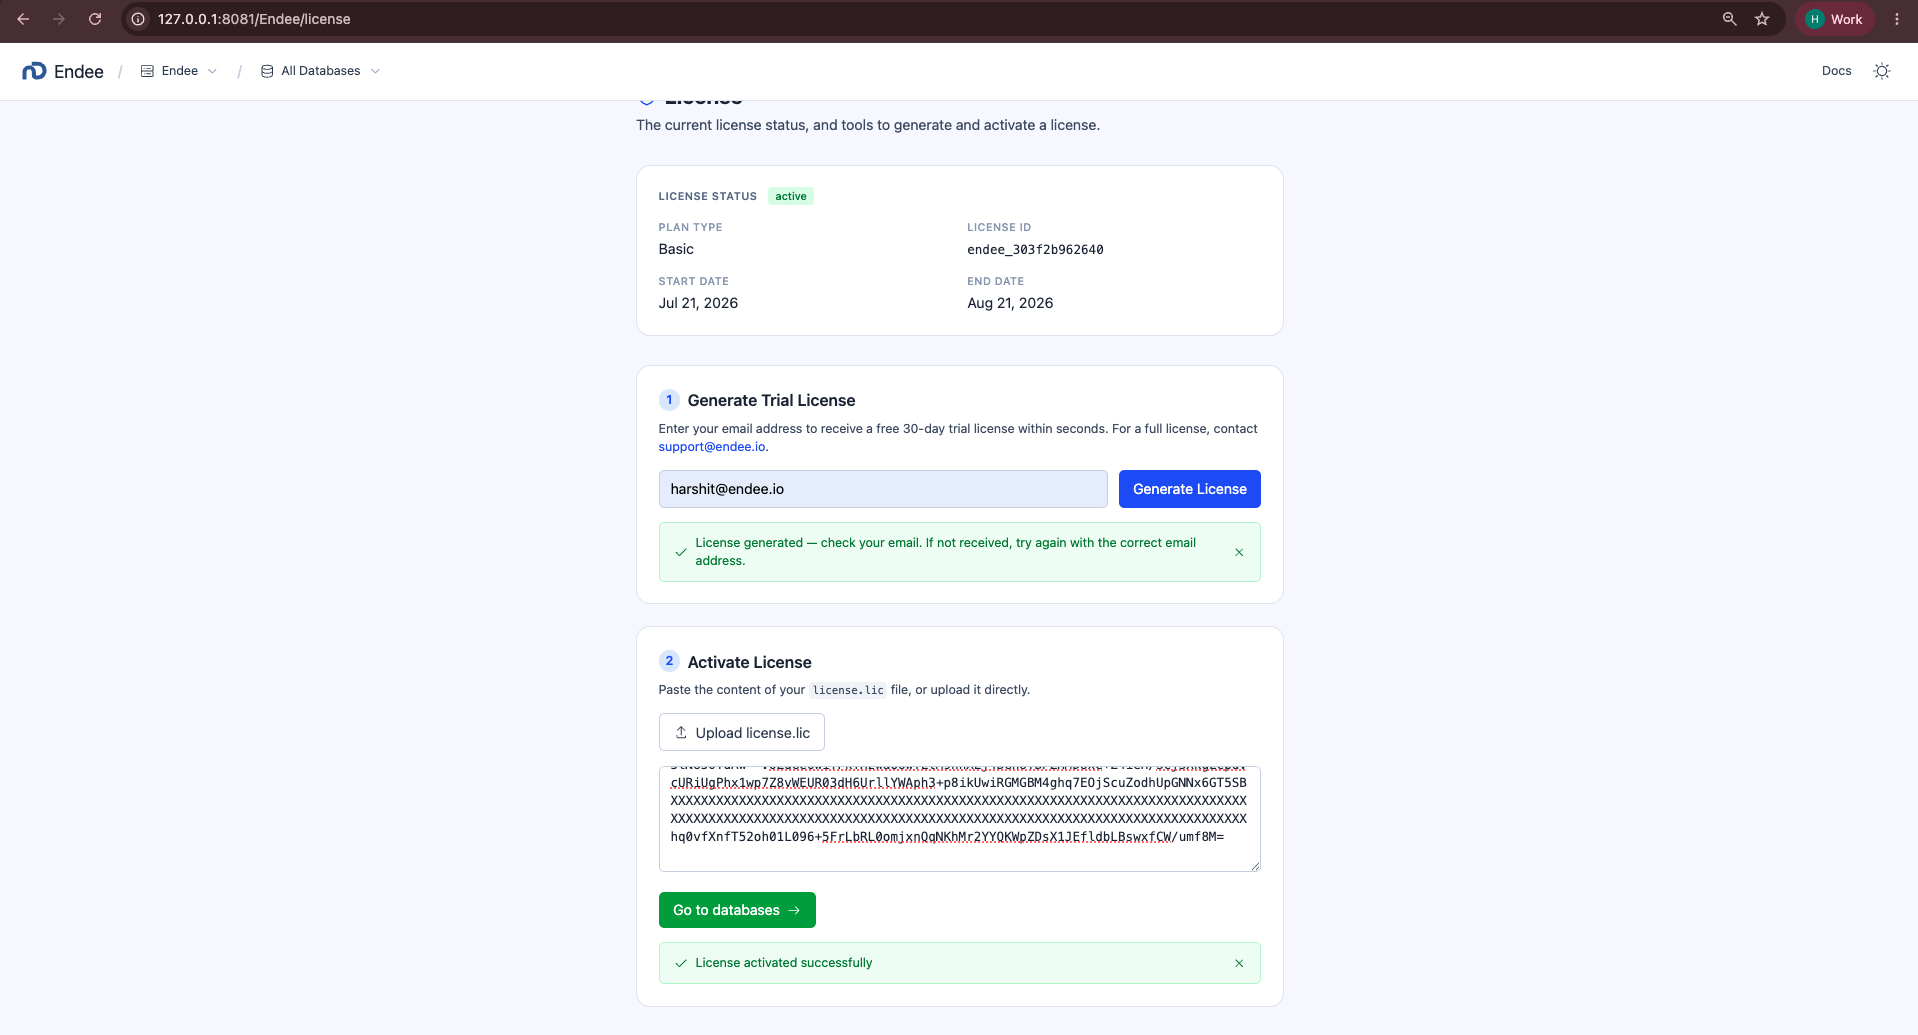
On the License page, enter your email address in the Generate Trial License field and click Generate License. You’ll receive a license.lic file by email within seconds.
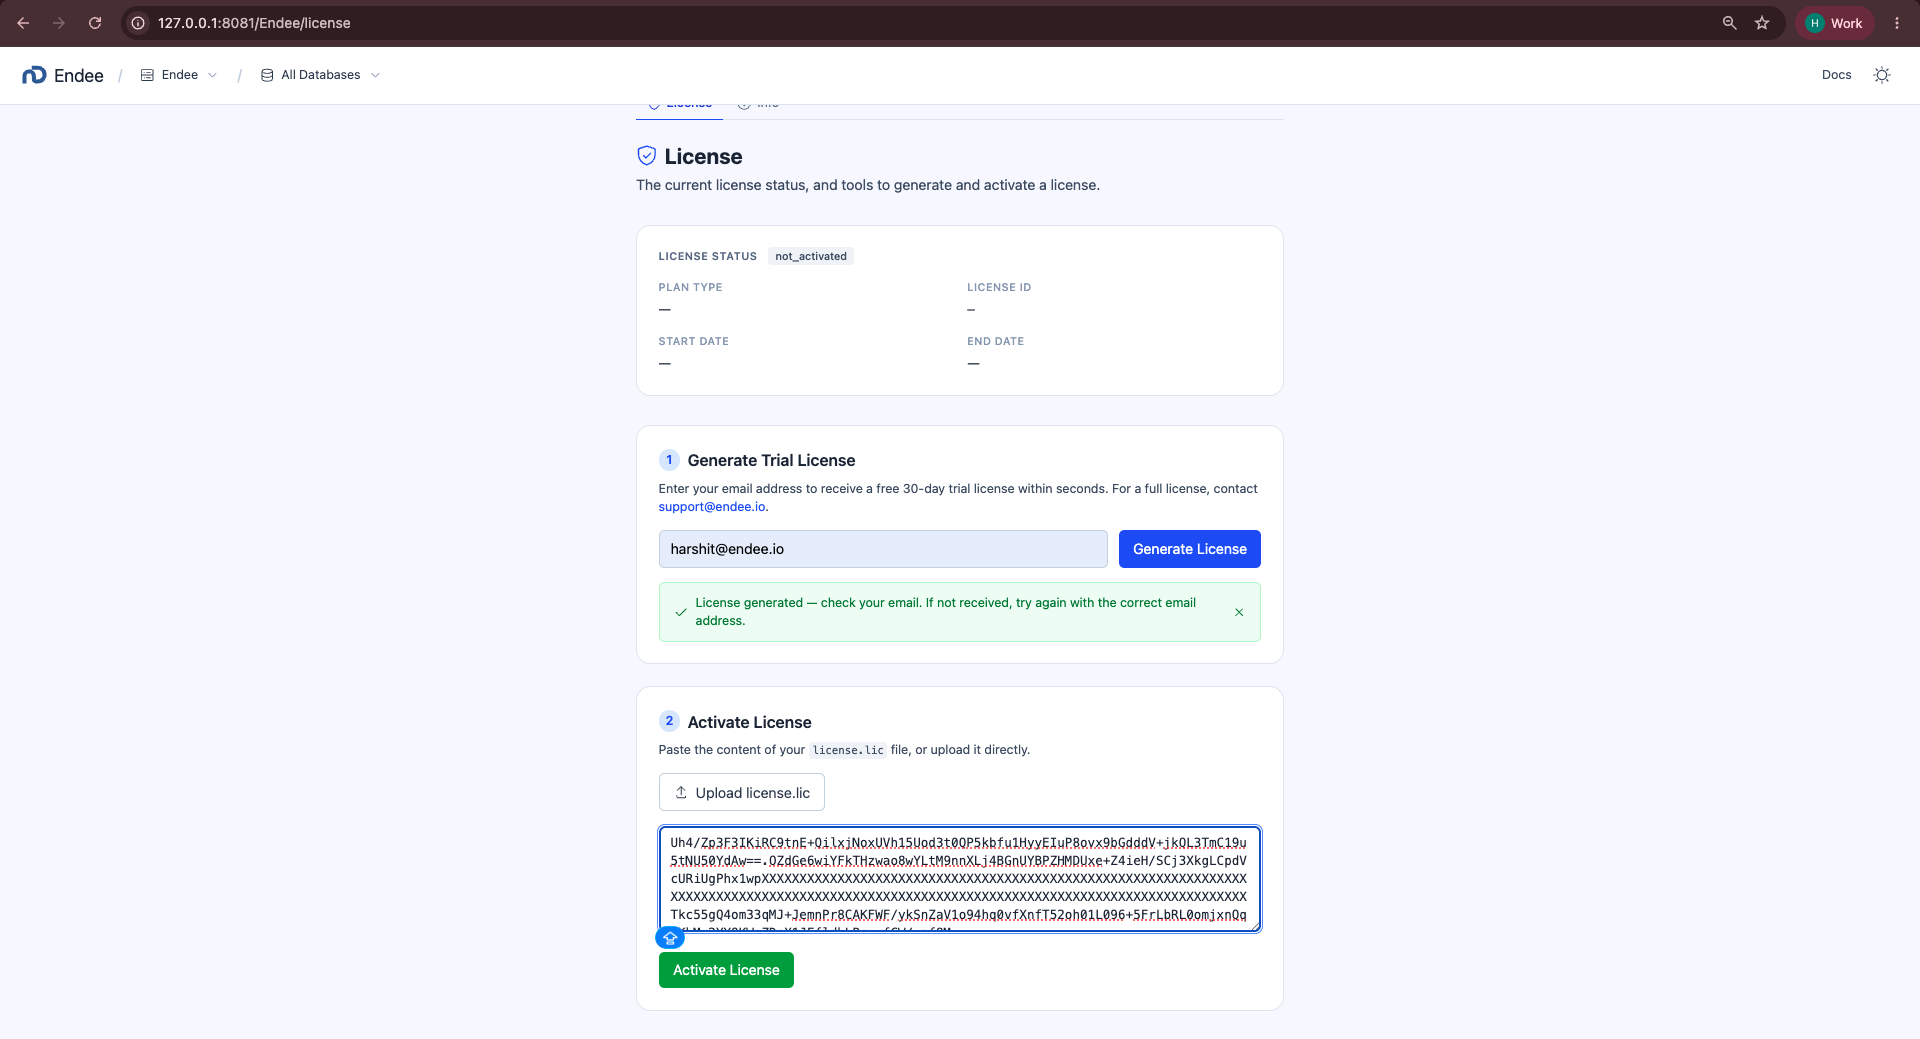
Step 2: Paste the license and activate.
Open the email, copy the full contents of license.lic, and paste them into the text area. You can also click Upload license.lic to upload the file directly. Then click Activate License.
License is now active.
The status updates to active and you’ll see your plan, license ID, and expiry date. All operations are unlocked immediately with no restart required. Click Go to databases to continue.
Auto-load on restart: On every startup, Endee checks for NDD_DATA_DIR/license/license.lic. If found, the license is validated and applied automatically. You only need to activate once as long as the data directory is preserved.
What is blocked without a license
| Operation | Without license |
|---|---|
GET /api/v2/health, /info, /stats | Allowed |
| List / describe collections (GET) | Allowed |
| Generate / validate license | Allowed |
| Create / delete collections | Blocked |
| Upsert, search, delete objects | Blocked |
| Backup creation, restore, upload | Blocked |
| Admin create / delete / modify | Blocked |
Install the SDK
Python
pip install endeeRequirements: Python 3.9+
Initialize the Admin Client
Enterprise deployments use a two-token model:
- Root token : control-plane operations: creating databases, minting tokens, server stats
- DB token : data operations: creating collections, upsert, search
Connect with your root token and point it at your server:
Python
from endee import Endee

admin = Endee(token="your-root-token")
admin.set_base_url("http://localhost:8080/api/v2")The root token can only perform admin operations (databases, tokens, server stats). It cannot create collections or run searches. Use a db token for all data work.
Create a Database and Get a Token
A database is the top-level namespace for your data. Creating one returns a db token that scopes all data operations to that database.
Python
# Returns the new db token string directly.
db_token = admin.create_database("mydb", db_type="enterprise")
print(db_token) # "mydb:9f3..."Connect with the Database Token
Use the db token for all data operations. Point the client at the same server:
Python
client = Endee(token=db_token)
client.set_base_url("http://localhost:8080/api/v2")Create a Collection
Python
client.create_collection(
    name="my_collection",
    fields=[
        {
            "name": "embedding",
            "type": "vector",
            "params": {"dimension": 384, "space_type": "cosine", "precision": "int8"},
        },
    ],
)
collection = client.get_collection("my_collection")Upsert and Search
Python
collection.upsert([
    {
        "id": "doc1",
        "meta": {"title": "First Document"},
        "filter": {"category": "tech"},
        "fields": {"embedding": [...]},   # 384-dim float list
    },
])

res = collection.search(
    fields={"embedding": {"query": [...], "limit": 5}},
)
for item in res["results"]["embedding"]:
print(f"ID: {item['id']}, Similarity: {item['similarity']:.3f}")Next Steps
- Admin Operations: full reference for database management, token administration, and cross-database collection operations
- Authentication: token model, token types, and managing tokens with a db token
- Concepts → Collections: field types, HNSW parameters, distance metrics
- Concepts → Search: single/multi-field search, hybrid fusion, filtered search
- Concepts → Backups: creating and restoring backups on self-managed deployments